
jueves, 30 de mayo de 2019
Diferences between OCI and OCI Classic
Some people are asking about the difference between OCI and OCI Classic, I have found these differences:

miércoles, 29 de mayo de 2019
How to install Audit Vault Agent to collect audit data from an Oracle Database
Downloading JDK for the Agent
Agent requires at least the version 1.8 of JDK
In this case, I am downloading "Linux x64 - jdk-8u211-linux-x64.tar.gz":

Registering the Host in Oracle Audit Vault
Login in to Oracle Audit Vault:


Downloading the Agent Jar File from Audit Vault Server
Login in to Oracle Audit Vault Server

Click in "Hosts" menu
Click in "Hosts" tab
Click in "Agent": The Agent and host monitor files are listed.
Click in "Download" Button next to the Agent file, and then save the "agent.jar" file in your machine. In this case "Agent Release 12.2.0.10.0".

In Audit Vault Server web console
Click in "Hosts" menu
Click in "Hosts" tab
Confirm that the agent status is now "Running"

If you need to troubleshoot the Agent, (database connection, etc), the Agent log is located in $AGENT_HOME/av/log. In my case is "/u01/app/av_agent_12c/av/log/"
Registering an Oracle Database in Oracle Audit Vault Server to Collect Audit Data
Creating the Secured Target
In Audit Vault Server web console
Click in "Secured Targets"
Click in "Targets"
Click in "Register"


And after some seconds the Status will be "Idle" which means waiting for the Database to generate more audit data to be collected.

Agent requires at least the version 1.8 of JDK
In this case, I am downloading "Linux x64 - jdk-8u211-linux-x64.tar.gz":

If the server where you are installing the Agent has already
Java 1.8 then you don’t have to do these steps. In my case, the Oracle database
home has only Java 1.6, that’s why I have to install Java 1.8 in a different Java Home for the agent:
[oracle@db12c
~]$ /u01/app/oracle/product/12.1.0/db1/jdk/bin/java -version
java version
"1.6.0_75"
Java(TM) SE
Runtime Environment (build 1.6.0_75-b13)
Java
HotSpot(TM) 64-Bit Server VM (build 20.75-b01, mixed mode)
[oracle@db12c
~]$
Transfer the java tar file to the database server where jave
will be installed:
[root@db12c
~]# pwd
/root
[root@db12c ~]# ls -ltr jdk-8u211-linux-x64.tar.gz
-rw-r--r-- 1
root root 194990602 Jun 18 08:20 jdk-8u211-linux-x64.tar.gz
[root@db12c ~]# mkdir -p /usr/java/
[root@db12c ~]# cd /usr/java/
[root@db12c java]# mv /root/jdk-8u211-linux-x64.tar.gz
.
[root@db12c java]# tar zxvf jdk-8u211-linux-x64.tar.gz
[root@db12c java]# ls
jdk1.8.0_211
jdk-8u211-linux-x64.tar.gz
[root@db12c java]# rm -rf jdk-8u211-linux-x64.tar.gz
[root@db12c java]# ls
jdk1.8.0_211
[root@db12c java]#
Checking the version of the JDK:
[oracle@db12c ~]$
/usr/java/jdk1.8.0_211/bin/java -version
java version
"1.8.0_211"
Java(TM) SE Runtime Environment
(build 1.8.0_211-b12)
Java HotSpot(TM) 64-Bit Server
VM (build 25.211-b12, mixed mode)
[oracle@db12c ~]$
Registering the Host in Oracle Audit Vault
Login in to Oracle Audit Vault:

Click in “Hosts” menu
In “Hosts” tab click in “Register”

Enter the hostname of the Database Server that that will be monitored
by Oracle Audit Vault
Enter the IP of the Database Server that will be monitored
by Oracle Audit Vault
Click in “Save” Button

Verify that the Host was added successfully.
Copy the “Agent Activation Key” because it will be used
later in this article to activate the agent.

Downloading the Agent Jar File from Audit Vault Server
Login in to Oracle Audit Vault Server

Click in "Hosts" menu
Click in "Hosts" tab
Click in "Agent": The Agent and host monitor files are listed.
Click in "Download" Button next to the Agent file, and then save the "agent.jar" file in your machine. In this case "Agent Release 12.2.0.10.0".

Transfer the agent jar to the database server:
[oracle@db12c ~]$ pwd
/home/oracle
[oracle@db12c ~]$ ls -ltr
agent.jar
-rw-r--r-- 1 oracle oinstall
30296508 Jun 18 08:12 agent.jar
[oracle@db12c ~]$
[oracle@db12c ~]$ export
JAVA_HOME=/usr/java/jdk1.8.0_211
[oracle@db12c ~]$ export
PATH=$JAVA_HOME/bin:$PATH
[oracle@db12c ~]$ java -jar agent.jar -d /u01/app/
Install
the Agent:
Check connectivity from Database server to the Oracle Audit
Vault:
[oracle@db12c ~]$ ping
192.168.56.20
PING 192.168.56.20
(192.168.56.20) 56(84) bytes of data.
64 bytes from 192.168.56.20:
icmp_seq=1 ttl=64 time=0.195 ms
64 bytes from 192.168.56.20:
icmp_seq=2 ttl=64 time=0.310 ms
64 bytes from 192.168.56.20:
icmp_seq=3 ttl=64 time=0.353 ms
^C
--- 192.168.56.20 ping
statistics ---
3 packets transmitted, 3
received, 0% packet loss, time 2001ms
rtt min/avg/max/mdev =
0.195/0.286/0.353/0.066 ms
[oracle@db12c ~]$
Check connectivity from the Oracle Audit Vault to the
Database Server:
login as: support
support@192.168.56.20's
password:
Last login: Thu Jun 13 13:27:30
2019 from 192.168.56.1
[support@avs08002778ad2b ~]$ su
-
Password:
Last login: Thu Jun 13 13:27:33
UTC 2019 on pts/0
[root@avs08002778ad2b ~]# ping
192.168.56.30
PING 192.168.56.30
(192.168.56.30) 56(84) bytes of data.
64 bytes from 192.168.56.30:
icmp_seq=1 ttl=64 time=0.355 ms
64 bytes from 192.168.56.30:
icmp_seq=2 ttl=64 time=0.435 ms
64 bytes from 192.168.56.30:
icmp_seq=3 ttl=64 time=0.318 ms
64 bytes from 192.168.56.30:
icmp_seq=4 ttl=64 time=0.239 ms
^C
--- 192.168.56.30 ping
statistics ---
4 packets transmitted, 4
received, 0% packet loss, time 3001ms
rtt min/avg/max/mdev =
0.239/0.336/0.435/0.074 ms
[root@avs08002778ad2b ~]#
Create the
Agent Home:
mkdir -p
/u01/app/av_agent_12c
Move the agent jar file to the new Agent Home:
[oracle@db12c ~]$ mv
/home/oracle/agent.jar /u01/app/av_agent_12c
Install the agent:
[oracle@db12c ~]$ cd
/u01/app/av_agent_12c/
[oracle@db12c av_agent_12c]$
java -jar agent.jar -d /u01/app/av_agent_12c/
[oracle@db12c av_agent_12c]$
java -jar agent.jar -d /u01/app/av_agent_12c/
Checking for updates...
Agent is updating. This
operation may take a few minutes. Please wait...
Agent updated successfully.
Agent installed successfully.
If deploying hostmonitor please
refer to product documentation for additional installation steps.
[oracle@db12c av_agent_12c]$
Activating the Agent:
To activate the agent you will need the “activation key”
that was copied at the beginning of this article. I
[oracle@db12c av_agent_12c]$
bin/agentctl start -k
Enter Activation Key: --Enter here the Activation Key--
Agent started successfully.
[oracle@db12c av_agent_12c]$
In Audit Vault Server web console
Click in "Hosts" menu
Click in "Hosts" tab
Confirm that the agent status is now "Running"

Checking status of Audit Agent:
[oracle@db12c av_agent_12c]$
bin/agentctl status
Agent is running.
[oracle@db12c av_agent_12c]$
Stop Audit Agent:
[oracle@db12c av_agent_12c]$
bin/agentctl stop
Stopping Agent...
[oracle@db12c av_agent_12c]$
Start Audit Agent: Activation key is only required in the first start.
[oracle@db12c av_agent_12c]$
bin/agentctl start
Agent started successfully.
[oracle@db12c av_agent_12c]$
Registering an Oracle Database in Oracle Audit Vault Server to Collect Audit Data
Creating the Secured Target
In Audit Vault Server web console
Click in "Secured Targets"
Click in "Targets"
Click in "Register"

Fill up the basic information of the Secured Target
Fill up the Section “Secured Target Location (For auditing)”
Click in “Save” Button

Verify that the Secured Target was created successfully:

In Audit Vault Server web console
Click in “Secured Targets”
Click in “Audit Trails” under “Monitoring” Section
Click in “Add” Button

Enter the “Audit Trail Type”, “Collection Host”, “Secured
Target”, “Trail Location” to collect auditing data from the Secured Target.
Click in “Save” Button

Verify that the information for collect audit information is
correct. You will see that the Status is "Stopped", that's normal, the next step is actually start it up.

Select the Audit Trail and then click in "Start" Button. And then click in "OK" Button to confirm.

The Audit Trail Status will change to "Starting"
NOTE: The status doesn't refresh automatically, you will have to refresh it "manually" (F5, or click in "Audit Trails" Menu)

And after some seconds the Status will be "Idle" which means waiting for the Database to generate more audit data to be collected.

martes, 28 de mayo de 2019
How to block a Session from a specific IP in Oracle Database Firewall
Environment:
- 1 Audit Vault Server
- 1 Database Firewall (Configured as Proxy in 192.168.56.11:5557)
- 1 Oracle Database (Listener: 192.168.56.30:1521/orcl)
- 1 Oracle Client (192.168.56.30)
With Oracle Database Firewall I will create an "Exception" that uses a "IP Address Set" to block a Session being created from an Oracle Client with IP 192.168.56.30
Checking that we can connect from the machine with IP 190.168.56.30:
[oracle@db12c ~]$ sqlplus dgomez/dgomez@192.168.56.11:5557/orcl
SQL*Plus: Release 12.1.0.2.0 Production on Wed Jun 12 04:56:32 2019
Copyright (c) 1982, 2014, Oracle.
All rights reserved.
Last Successful login time: Wed Jun 12 2019 04:56:28 -06:00
Connected to:
Oracle Database 12c Enterprise Edition Release 12.1.0.2.0 - 64bit
Production
With the Partitioning, OLAP, Advanced Analytics, Real Application
Testing
and Unified Auditing options
SQL> select * from dgomez.allowed;
COL1
--------------------
DEIBY
SQL>
Login into Oracle Audit Vault Server Web Console:

Click in "Policy" and then "Create Policy":

Select Database Type, Policy Name, and Description. The Database Type should be according the the Database we are monitoring with Oracle Database Firewall, in my case, of course Oracle Database.

You will see all the sections that we can fill up in order to Block/Allow operations against the database, we can custom this as much as we want. Click in "IP Address Sets" under "Policy Controls":

Click in "Create New Set":

Type the name of the New Set, and also the IP that will be used by the "Exception". In this case, the IP that we want to block.

Verify that the IP Address Set was added correctly:

Now come Back to the "Policy Overview" Page, click in the title:
Click in "Add Exception" under "Exception Rules":

Type the name of the Exception Rule, in the section "Profile Sets" select "include" for "IP Address Set" and select the IP Address Set that was created before, in my case "IP Address set 1".
In the Section "Policy Controls" select "Block" for "Action", you can select any value for "Logging Level" and "Threat Severity".

Click in "Save" button.

Verify that the Exception rule was created successfully:

Come Back to the "Policy Overview" Page, click in the title:
Click in "Save":

Click in "Publish":

Verify that the new Policy was created successfully:

Now it's time to tell the Database Firewall which Policy should use for our Database.
Click in "Secured Targets", the Oracle Database will be there, select it. In my case the Secured Target is "db12c". If you don't know how to create a "Secured Target" check my previous article [How to configure Oracle Database Firweall as Proxy in DPE Mode].

Expand the section "Firewall Policy":

Select the Policy that was created before in this article, in my case "Policy1":

Verify that Secured Target is using the correct Policy:

Now it's time to test the configuration.
From the Oracle Client (192.168.56.30) I will try to connect to the Database through the Oracle Database Firewall which is configured as Proxy.
Check the IP of Oracle Client:
[oracle@db12c ~]$ ifconfig|egrep -A1 enp0
enp0s3: flags=4163<UP,BROADCAST,RUNNING,MULTICAST> mtu 1500
inet 192.168.56.30 netmask 255.255.255.0 broadcast 192.168.56.255
Opening a new Session:
[oracle@db12c ~]$ sqlplus dgomez/dgomez@192.168.56.11:5557/orcl
SQL*Plus: Release 12.1.0.2.0 Production on Wed Jun 12 04:59:40 2019
Copyright (c) 1982, 2014, Oracle.
All rights reserved.
<< The Session just hang here indefinitely >>
If there was a session already Open at the time we set the Policy for this database, then the session will not able to perform any operation as you can see bellow, the session will get the error ORA-00900 for new upcoming operations:
SQL> select * from dgomez.allowed;
select * from dgomez.allowed
*
ERROR at line 1:
ORA-00900: invalid SQL statement
SQL>
Additional, I saw that if in the "Exception Rule" we put a text in "Substitution" field, then a different error is received when a new session is created.
Using "Tests 1" in "Substitution" field:

Error received when "Substitution" is specified:
[oracle@db12c ~]$ sqlplus dgomez/dgomez@192.168.56.11:5557/orcl
SQL*Plus: Release 12.1.0.2.0 Production on Wed Jun 12 05:13:20 2019
Copyright (c) 1982, 2014, Oracle.
All rights reserved.
ERROR:
ORA-00900: invalid SQL statement
ERROR:
ORA-00900: invalid SQL statement
Error accessing PRODUCT_USER_PROFILE
Warning: Product user profile
information not loaded!
You may need to run PUPBLD.SQL as SYSTEM
ERROR:
ORA-00900: invalid SQL statement
Error accessing package DBMS_APPLICATION_INFO
SP2-0575: Use of Oracle SQL feature not in SQL92 Entry Level.
Configure Oracle Audit Vault Server in High Availability
Version of Oracle Audit Vault Server to use in this article: 12.2.0.10.0
IP of the Primary Audit Vault Server: 192.168.56.20
IP of the Secondary Audit Vault Server: 192.168.56.40
Configuring the Secondary Oracle Audit Vault Server
Login in to Oracle Database Firewall web console of the Primary Oracle Audit Vault Server:
In the "Settings" tab of Primary Audit Vault Server, from the "Security" menu, click "Certificate".
Copy the certificate.

In another browser window, log in to Secondary Audit Vault Server as a super administrator.
In the Secondary Audit Vault Server web console, click the "Settings" tab.
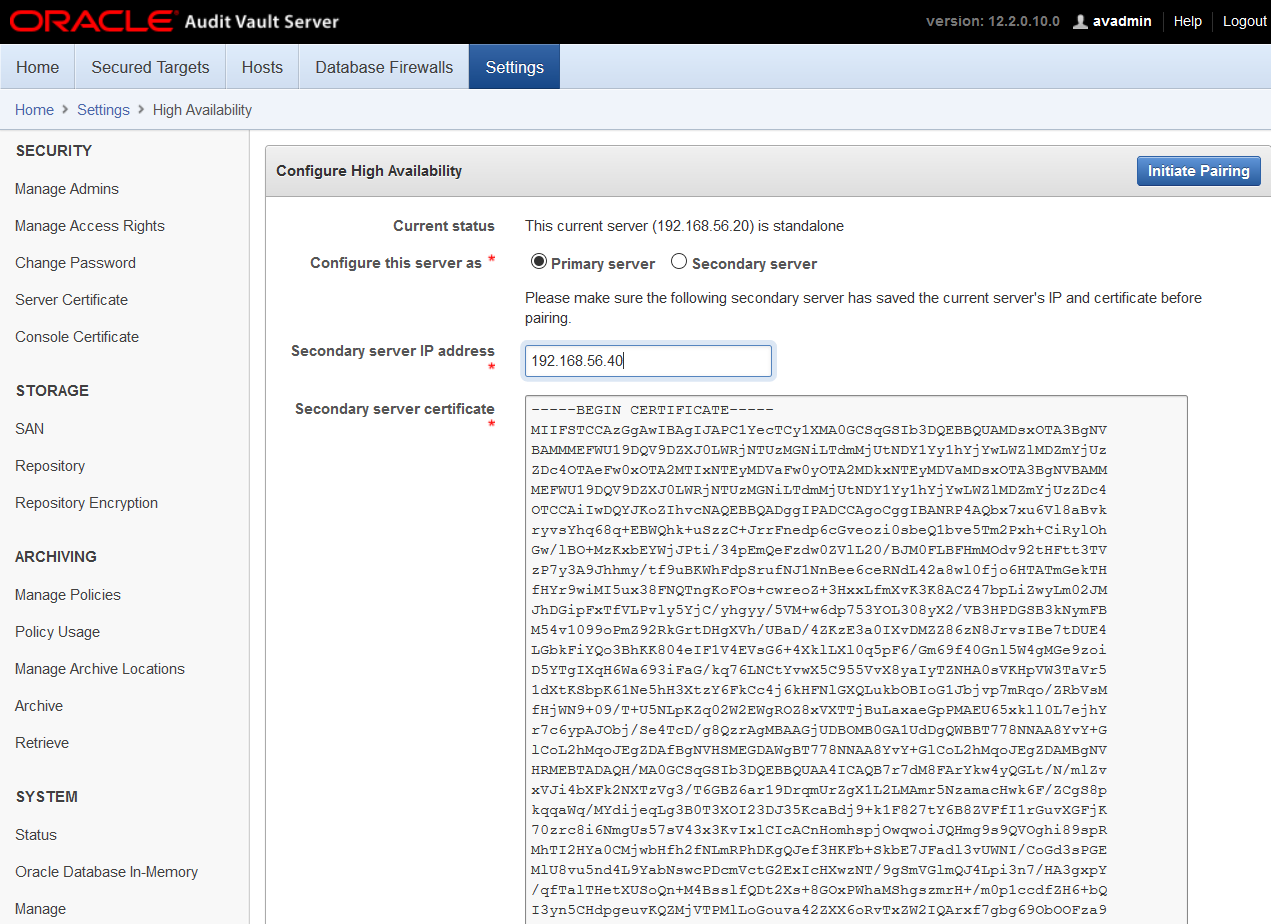
From the "System" menu, select "High Availability".
Click in “Configure this server as: Secondary Server”
In the Peer System IP Address field, enter the IP address of Server1.
In the Peer System Certificate field, paste the certificate of Server1.
Click Save.

Configuring the Primary Oracle Audit Vault Server
Log in to Secondary Audit Vault Server as an administrator.
In the Settings tab of Server1, from the Security menu, click Certificate.
Copy the certificate.

In another browser window, log in to Primary Audit Vault Server web console as a super administrator.
In the Primary Audit Vault web console, click the "Settings" tab.
From the "System" menu, select "High Availability".
Select the checkbox "Configure this system as: Primary server".
In the Peer System IP Address field, enter the IP address of Secondary Audit Vault Server.
In the Peer System Certificate field, paste the certificate of Secondary Audit Vault Server.

Click in "Initiate Pairing"
A message will appear asking if you are sure. Click in "OK".

A message will appear saying the configuration will be completed in around 10 minutes:

There was not Data guard Configuration:
All the options of the script:

For Failover, take in consideration the following:
When failover is enabled, during normal operation, the system periodically checks the availability of the primary Audit Vault Server in the resilient pair.
Note the following scenarios:
DGMGRL> show configuration;
Configuration - DBFWDB
Protection Mode: MaxPerformance
Members:
DBFWDB_HA2 - Primary database
Warning: ORA-16829: fast-start failover configuration is lagging
DBFWDB_HA1 - (*) Physical standby database (disabled)
ORA-16661: the standby database needs to be reinstated
Fast-Start Failover: ENABLED
Configuration Status:
WARNING (status updated 26 seconds ago)
IP of the Primary Audit Vault Server: 192.168.56.20
IP of the Secondary Audit Vault Server: 192.168.56.40
Configuring the Secondary Oracle Audit Vault Server
Login in to Oracle Database Firewall web console of the Primary Oracle Audit Vault Server:

Copy the certificate.

In another browser window, log in to Secondary Audit Vault Server as a super administrator.
In the Secondary Audit Vault Server web console, click the "Settings" tab.
From the "System" menu, select "High Availability".
Click in “Configure this server as: Secondary Server”
In the Peer System IP Address field, enter the IP address of Server1.
In the Peer System Certificate field, paste the certificate of Server1.
Click Save.

Configuring the Primary Oracle Audit Vault Server
Log in to Secondary Audit Vault Server as an administrator.
In the Settings tab of Server1, from the Security menu, click Certificate.
Copy the certificate.

In another browser window, log in to Primary Audit Vault Server web console as a super administrator.
In the Primary Audit Vault web console, click the "Settings" tab.
From the "System" menu, select "High Availability".
Select the checkbox "Configure this system as: Primary server".
In the Peer System IP Address field, enter the IP address of Secondary Audit Vault Server.
In the Peer System Certificate field, paste the certificate of Secondary Audit Vault Server.
Click in "Initiate Pairing"
A message will appear asking if you are sure. Click in "OK".

A message will appear saying the configuration will be completed in around 10 minutes:

During the Pairing Process I took a look into the Primary
Database to understand how the High Availability configuration is done. First I
saw that the Primary database was in “No Archive log” mode.
SQL> archive log list
Database log mode No Archive Mode
Automatic archival Disabled
Archive destination USE_DB_RECOVERY_FILE_DEST
Oldest online log sequence 6
Current log sequence 8
SQL>
SQL>
[oracle@avs08002778ad2b ~]$
dgmgrl /
DGMGRL for Linux: Version
12.1.0.2.0 - 64bit Production
Copyright (c) 2000, 2013,
Oracle. All rights reserved.
Welcome to DGMGRL, type
"help" for information.
Connected as SYSDG.
DGMGRL> show configuration;
ORA-16525: The Oracle Data
Guard broker is not yet available.
Configuration details cannot be
determined by DGMGRL
DGMGRL> exit
But after some minutes I saw the Primary Database was working
in Archive Log Mode.
SQL> archive log list
Database log mode Archive Mode
Automatic archival Enabled
Archive destination USE_DB_RECOVERY_FILE_DEST
Oldest online log sequence 7
Next log sequence to
archive 9
Current log sequence 9
SQL>
That made me think that the High Availability configuration for
Oracle Audit Vault servers is done with Oracle Data Guard, then I decided to
check:
DGMGRL> show configuration;
Configuration - DBFWDB
Protection Mode: MaxPerformance
Members:
DBFWDB_HA1 - Primary database
DBFWDB_HA2 - Physical standby database
Fast-Start Failover: DISABLED
Configuration Status:
DISABLED
DGMGRL>
And after some minutes the Data Guard Configuration was working
fine:
DGMGRL> show configuration;
Configuration - DBFWDB
Protection Mode: MaxPerformance
Members:
DBFWDB_HA1 - Primary database
DBFWDB_HA2 - (*) Physical standby database
Fast-Start Failover: ENABLED
Configuration Status:
SUCCESS (status updated 13 seconds ago)
DGMGRL>
There is another nice script provided by oracle to check the
status of the Audit Vault Server High Availability configuration:
[oracle@avs08002778ad2b ~]$
/usr/local/dbfw/bin/setup_ha.rb --status
HA mode: PRIMARY
HA server 1:
192.168.56.20
HA server 2:
192.168.56.40
Unique database name:
DBFWDB_HA1
Current database role: PRIMARY
Data guard broker: ENABLED
Data guard observer: YES
Current log mode: ARCHIVELOG
Logging forced: YES
Flashback mode: YES
Current open mode: READ WRITE
Switchover status: TO STANDBY
Automatic failover: ENABLED
Failover status: TARGET UNDER LAG LIMIT
Missing listener services: NONE
Archive destination: ENABLE
Recovery mode: MANAGED REAL TIME APPLY
FRA size: 47,244,640,256
FRA used: 2,189,426,688
FRA reclaimable: 1,113,587,712
FRA available: 46,168,801,280
Gap status: NO GAP
Archived sequence: 13
Applied sequence: 12
Apply lag: 0:00:21
[oracle@avs08002778ad2b ~]$
[oracle@avs08002778ad2b ~]$
/usr/local/dbfw/bin/setup_ha.rb -h
Usage:
/usr/local/dbfw/bin/setup_ha.rb configure [options]
-v, --verbose Verbose mode
-R, --randompassword Create random SYS password
--syslog Send the output to the
syslog instead of stdout
--foreground Run all operations in
foreground
--standby Configure standby database
(internal)
--configure Configure HA on primary and
standby systems
--unconfigure Unconfigure existing HA system
--synchronize Synchronize data not stored in
the database
--switchover Swap primary and standby roles
--post_switchover Execute actions on new primary
after the database switchover completes (internal)
--post_primary_upgrade operations on standby after primary
upgrade(Internal)
--database_key_info Collect database key info (internal)
--system_properties Collect system properties (internal)
--storage_configuration Export storage configuration (internal)
--failover Failover to standby database
--disable_failover Disable automatic failover
--enable_failover Enable automatic failover if it was
previously disabled. The automatic failover is enabled by default.
--process_status Return the status of setup_ha
process as exit code
--dg_status Print Data Guard Broker
status
--handle_role_change Handle role change
--status Print HA configuration
status
--ha_role Return HA role as exit code
--partner_ha_role Return partner HA role as exit code
--check_cfg Check the AVS HA
configuration (internal)
--correct_ha Check the AVS HA settings and
correct if necessary (internal)
--test_settings Test if the system settings are
correctly configured for HA
--update_partner_ip IP Update the configuration file with the
new IP of the other AVS
-h, --help Show this message
[oracle@avs08002778ad2b ~]$
After to wait some minutes. The High Availability was completed, we can check the current status in the web console of the primary
Oracle Audit Vault Server. If you try to access the web console of Secondary
Oracle Audit Vault server you will be redirected automatically to the primary
one.

For Failover, take in consideration the following:
When failover is enabled, during normal operation, the system periodically checks the availability of the primary Audit Vault Server in the resilient pair.
Note the following scenarios:
- If the primary Audit Vault Server becomes unavailable, the system automatically fails over to the secondary Audit Vault Server after a 10 minute delay. The delay prevents a failover due to a reboot of the primary server.
DGMGRL> show configuration;
Configuration - DBFWDB
Protection Mode: MaxPerformance
Members:
DBFWDB_HA2 - Primary database
Warning: ORA-16829: fast-start failover configuration is lagging
DBFWDB_HA1 - (*) Physical standby database (disabled)
ORA-16661: the standby database needs to be reinstated
Fast-Start Failover: ENABLED
Configuration Status:
WARNING (status updated 26 seconds ago)
- If the primary Audit Vault Server is manually shut down, the failover process is not triggered. If you bring the primary Audit Vault Server back online, then it continues in high availability mode.
- If the primary Audit Vault Server is manually shut down and reinstalled or replaced with another server, then you must perform the following procedure:
- Manually failover the current standby server by issuing the following command as the oracle user: /usr/local/dbfw/bin/setup_ha.rb --failover
- Then log in to the Audit Vault console as the super administrative user so that you can unpair the two servers.
- Select Settings, and then select High Availability.
- In the High Availability status page, click the Unpair button.
- Copy the new certificates between the two Audit Vault servers.
- Initiate the high availability setup again by clicking the Initiate Pairing button.
- In the event of a failover, the secondary server becomes the new primary Audit Vault Server. You must do the following to configure this primary server, and repeat the high availability pairing:
- Log in to the Audit Vault Server console as a super administrator.
- Click on the Settings tab.
- Select Settings, and then select High Availability.
- In the High Availability Status page, unpair the new primary server to convert it to a standalone server by clicking on the Unpair button.
- On the standalone server, configure the network and services settings (for example DNS settings).
- On the standalone server, manually mount any remote filesystems (NFS shares) defined as archive locations, using this AVCLI command: ALTER REMOTE FILESYSTEM filesystem_name MOUNT
- Disconnect the failed server and replace it. The replacement server can now be configured as the new secondary server.
- Follow the configuration steps again to pair the two Audit Vault Servers.
Suscribirse a:
Entradas (Atom)
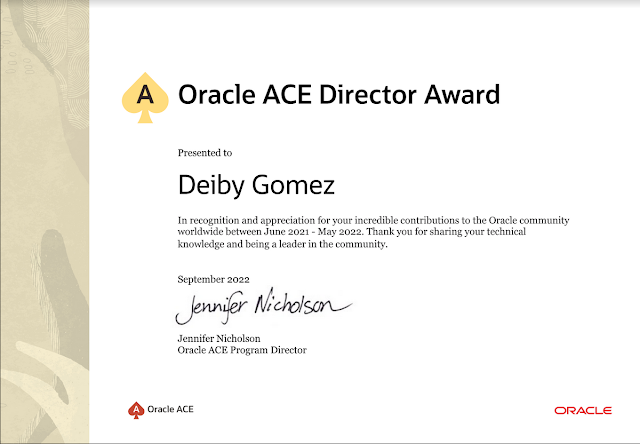
Oracle ACE Director Award - Deiby Gómez
Thanks #OracleACE Program for this awesome certificate recognizing the work I have done in the community for the last year. Looking forwa...
-
 After migrate a VM with Microsoft Windows Server 2019 Standard to OCI, the instance was not responding in its public IP, even when I verif...
 -
 In this article I will show how to create a Second SCAN that can be used for a dedicated and isolated purpose. The initial configuration i...
 -
In Oracle 21c we have two new parameters. MAX_IDLE_TIME MAX_IDLE_BLOCKER_TIME For the parameter MAX_IDLE_TIME, oracle documentation provid...