jueves, 23 de abril de 2020

Patching Oracle Cloud Classic Database Services kills the EMCC Agent

As you know, after successfully patching a database it is always needed to test all the applications that depend of the database.

I found this behavior after I patched a database that reside in an Oracle Cloud Classic Infrastructure.

All the applications were working fine and without any issues, everything was fine… until someone wanted to start the normal monitoring process though Oracle Enterprise Manager Cloud Control.

A support ticket reported that it seemed that the EMCC agent was not working, so, I thought: no problem, I will start the agent from the server as normal or maybe it needs an uploading and reloading data operation (normal issue when you work with EMMC agents).

I logon to the server using the oracle user, then I go to the path where the Agent was supposed to be installed and… SURPRISE! The EMCC agent was not there anymore, all the installation disappeared, I checked the Oracle Inventory and nothing, there was no trace that the agent existed before.

Immediately I started a forensic analysis trying to find the cause of the problem, of course, the patching process made the day before seems to be the guilty.

This is the actual scenario, symptoms, cause and workarounds:

Scenario:
  • Database version: 12.2.0.1
  • Oracle Home: /u01/app/oracle/product/12.2.0/dbhome_1/
  • Infrastructure: Oracle Cloud Classic Infrastructure
  • Tool used to install the patch: dbaascli command line tool but I it happens even if you use the GUI Console.
  • EMCC Agent version: 13c, but It happens with any EMCC Agent version.
Symptoms:
  • EMCC agent not working, the EMCC Console reported that the agent was not active.
  • Agent Home directory /u01/app/oracle/product/13.3/agent/agent_inst disappeared.
  • Oracle Inventory at /u01/app/OraInventory/Contents.xml content had only the database Home.
Cause:

As I told you, the patching process was made using the dbaascli command line tool. I wont go into details, you can check and article with all the process in the next link (LINK).

What I did was investigate the log files generated during the patch application and track all the operations done.

You can find a series of log file in the directory/var/opt/oracle/log/dbpatchm/


The default log file is the dbpatchm.log file, so I investigated that first. I found the next steps:

2020-02-26 18:21:50 - INFO: started copying needed config files into golden image
2020-02-26 18:21:50 - INFO: em home /u01/app/oracle/product/13.3/agent/ is being copied to /u01/download/app/oracle
2020-02-26 18:21:50 - Output from cmd cp -pR /u01/app/oracle/product/13.3/agent/ /u01/download/app/oracle run on localhost  is:
2020-02-26 18:25:55 - cmd took 245 seconds


It seems that the tool is copying the Agent Home to a temporary directory, that is fine.
Then I found a lot of lines detailing the patching process, nothing strange so far.
But what happens after patching?


2020-02-26 18:31:17 - INFO: em home /u01/app/oracle/product/13.3/agent/agent_inst is being attached to the inventory
2020-02-26 18:31:17 - Output from cmd cd /u01/app/oracle/product/12.2.0/dbhome_1/oui/bin; ./runInstaller -silent -attachHome ORACLE_HOME="/u01/app/oracle/product/13.3/agent/agent_inst" ORACLE_HOME_NAME="EM_HOME" run on localhost  is:
2020-02-26 18:31:17 -
The user is root. Oracle Universal Installer cannot continue installation if the user is root.
2020-02-26 18:31:17 - cmd took 0 seconds
2020-02-26 18:31:17 - WARN : non-zero status returned
  Command: cd /u01/app/oracle/product/12.2.0/dbhome_1/oui/bin; ./runInstaller -silent -attachHome ORACLE_HOME="/u01/app/oracle/product/13.3/agent/agent_inst" ORACLE_HOME_NAME="EM_HOME"
  Exit: 255
  Excerpt:
The user is root. Oracle Universal Installer cannot continue installation if the user is root.

I found that during the process, Oracle is creating a new directory for the software, the old stuff is moved to /u01/download including the agent home. After that it tries to copy back the home and register it again in the inventory, but the registration fails due, a in my opinion, a silly reason: in order to register the Agent to the inventory the operation must run with the Oracle User instead of root. But the process that invoke the task (patching the database) must be run using the root user. How is this possible? Oracle bug? Or maybe I am not following the right path for patching? You can draw your own conclusions.

I tested the process two more times in a test environment:
  • First, I manually stopped the Agent and then patched the database using dbaascli. Same result
  • Then, I patched using the GUI console through a web browser, stopping the agent first. Same result.
Workaround:
Frustrated, I can think in two methods to avoid the issue for future patching tasks:
  • Before patching, copy the installation directory to a new location and after that, copy back and re-attach the Agent Home in the inventory, manually. (this is the action the tool tries to perform but fails)
  • Reinstall the agent binaries to a different location out of /u01/app before patching. But maybe this has no sense because my original installation is based on the Oracle best practices.
Summary:

I decided to share this post because during my analysis I never found a related Oracle document or bug reporting similar issues. Now you know the cause of the problem, maybe you can thing in a better way to avoid it.


Applying Patch in a DB System – Oracle Cloud Classic

In the next article, I will show you how to apply the latest patch to an Oracle Cloud Infrastructure Classic Database System using the command line tool dbaascli.

As you know, OCI Classic was the first version of Oracle Cloud, is a secure, reliable, low cost, standards-based infrastructure service.

We have two ways of patching a database:
  1. Using the Oracle Cloud GUI trough an Internet browser.
  2. Using the console tool dbaascli.
Boot methods are secure and valid, but I always prefer to use the command console tool because I have direct access to the status and logs in case any issue during the process.

During this article I will use the Cloud GUI console for some tasks, so we need access to the cloud tenancy and access to the Database resource. So, let’s begin.

First step, not always needed but strongly recommended: Create a backup!

Go to the Database classic option and click on Instances option. Inside the Instance option, select the database instances you want to patch and click on the name to enter to the administration console.


On the Admin Console, the step is as simple as Click on the Backup Now button. A confirmation windows will ask if we want to keep the backup taken forever, select No (default) and click on Backup.


Wait until the backup finished. The time needed for the backup will depend on the database size. The database status will change to Backing up during the process and will change to Available when the backup finished.

The last step was the only action executed by the GUI console. Now, we access the server residing the database using the OPC user and the we change to the root user. All the actions performed now must be executed using the root user.

ssh opc@130.XXX.103.40
[opc@prd10dbe ~]$
[opc@prd10dbe ~]$ sudo su -
[root@prd10dbe ~]#

Now, Im going to update my command line tool dbaascli, this step is equivalent to update the Opatch tool when we are using on premise databases.

[root@prd10dbe ~]# dbaascli patch tools list
DBAAS CLI version 18.4.6.1.0
Executing command patch tools list
Current Patchid : 18.4.6.1.0_191003.1238
No applicable tools patches are available


In this case, we can see a message saying that there are no Applicable tools patches available. if updates are available a message will appear with the patch ID and the command needed to apply the update, the message will be similar than:


Next step. Validate the patch, this step is similar than run an opatch prereq command.

[root@prd10dbe ~]# dbaascli patch db prereq -- patchid LATEST
DBAAS CLI version 18.4.6.1.0
Executing command patch db prereq -- patchid LATEST
INFO: DBCS patching
This might take some time, please take a look at file /var/opt/oracle/log/dbpatchm/dbpatchm.log for progress
Use of uninitialized value $imgsize in string eq at /var/opt/oracle/patch/../perl_lib/DBAAS/oss_patch.pm line 1538.
Use of uninitialized value $imgsize in concatenation (.) or string at /var/opt/oracle/patch/../perl_lib/DBAAS/oss_patch.pm line 1540.
Use of uninitialized value $dbimgsize_in_gb in numeric lt (<) at /var/opt/oracle/patch/dbpatchm line 2547.
Prereq check completed successfully, ready to apply patch

On the file dbpatchm.log we will find the result of the analysis, in this case the prereq check was successful. Please check the next step if the analysis fails.

(Optional step) If an error had found during the prereq check. We can check the dbpatchm.log file to find the patch id that may cause conflict with the latest patch. The message will be similar than:

ZOP-47: The patch(es) has supersets with other patches installed in the Oracle Home (or) among themselves.

Prereq "checkConflictAgainstOHWithDetail" failed.

Summary of Conflict Analysis:

There are no patches that can be applied now.

Following patches have conflicts. Please contact Oracle Support and get the merged patch of the patches :

26272761, 28662603

Conflicts/Supersets for each patch are:


Patch : 28662603

        Conflict with 26272761

If this is the case, we need to rollback the patch that is causing the conflict. So, we are going to use an old friend to resolve this, follow the steps below:
  • Enter to the oracle user: su – oracle
  • Stop the listener: lsnrctl stop
  • Stop the database: sqlplus / as sysdba, shutdown immediate;
  • Go to the opatch location: cd $ORACLE_HOME/opatch
  • And rollback the conflicting patch: ./opatch rollback -id 26272761
If the prereq step finished well, we can continue with this step. If a rollback patch operation was needed repeat the step #4 to precheck the patch again until the operation succeeds. So, now we can apply the patch.


[root@prd10dbe ~]# dbaascli patch db apply --patchid LATEST

DBAAS CLI version 18.4.6.1.0
Executing command patch db apply --patchid LATEST
INFO: DBCS patching
This might take some time, please take a look at file /var/opt/oracle/log/dbpatchm/dbpatchm.log for progress

Use of uninitialized value $imgsize in string eq at /var/opt/oracle/patch/../perl_lib/DBAAS/oss_patch.pm line 1538.

Use of uninitialized value $imgsize in concatenation (.) or string at /var/opt/oracle/patch/../perl_lib/DBAAS/oss_patch.pm line 1540.

Use of uninitialized value $dbimgsize_in_gb in numeric lt (<) at /var/opt/oracle/patch/dbpatchm line 2547.

catcon: ALL catcom-related output will be written to [/var/opt/oracle/log/dbpatchm/cdb_utlrp_catcom_21532.lst]
catcon: See [/var/opt/oracle/log/dbpatchm/cdb_utlrp_*.log] files for output generated by script.
catcon: See [/var/opt/oracle/log/dbpatchm/cdb_utlrp_*.lst] files for spool files, if any
catcon.pl: completed successfully

Patch installed successfully

We can monitor the file /var/opt/oracle/log/dbpatchm/dbpatchm.log during the patching process.

Note: the patching process will run in background so, don’t worry if you have any issues with your ssh session the process will finish by itself and you can check the status with the log file.
  • Once the patch finished successfully, we can perform some database validations:
    • Listener status
    • PDB’s open mode
    • Opatch inventory
    • Object status
Summary:

Patching an Oracle Infrastructure Cloud Classic Database Service is a simple process (maybe more than the on premise) than can be done by multiple choices. The way you choose will depend of your preferences and the type of control you desire. Just remember always keep your database updated.

How to migrate VirtualBox VM to Oracle Cloud (Linux 7.5 64-bits)

In this article I will show the procedure to migrate an Oracle VirtualBox VM with Oracle Linux 7  to Oracle Cloud Infrastructure as an Instance, check the kernel info:

[root@db12c ~]# uname -a

Linux db12c 4.1.12-112.16.4.el7uek.x86_64 #2 SMP Mon Mar 12 23:57:12 PDT 2018 x86_64 x86_64 x86_64 GNU/Linux

The VM running in VirtualBox:


Preparation of the VM:

Oracle has published some prerequisites we have to comply before to export the VM from VirtualBox:


So I am pretty sure about most of them, except the DHCP. After to check the VM I confirmed to used an static IP, so I changed it to use DHCP to get the IP automatically:


[root@db12c ~]# cat /etc/sysconfig/network-scripts/ifcfg-eth0
TYPE=Ethernet
BOOTPROTO=DHCP
DEFROUTE=yes
NAME=eth0
DEVICE=eth0
ONBOOT=yes
PREFIX=24
[root@db12c ~]#


NOTE: Check that your interfaz is called "eth0" because in Oracle Cloud that's the name your interfaz will receive. 

For example, in my VM I had the interfaz called "ifcfg-enp0s3", so I had to change this.

Next step is to confirm that virtio drivers are installed:


[root@db12c ~]# lsinitrd | grep -i virtio
virtio_net virtio_balloon' -f -v
[root@db12c ~]#

An empty output means the virtio drivers are not built inside initrd, so before to rebuilt it with the drivers, it's recommended to take a backup:


root@db12c ~]# ls -la /boot/initramfs-$(uname -r).img
-rw------- 1 root root 57899298 Apr 21 17:16 /boot/initramfs-4.1.12-112.16.4.el7uek.x86_64.img
[root@db12c ~]# cp /boot/initramfs-$(uname -r).img /boot/initramfs-$(uname -r).img.bak
[root@db12c ~]#

Then we can proceed to build initrd with virtio modules:

[root@db12c ~]# dracut --add-drivers "virtio virtio_ring virtio_pci virtio_scsi virtio_net virtio_balloon" -f -v /boot/initramfs-`uname -r`.img `uname -r`
Executing: /usr/sbin/dracut --add-drivers "virtio virtio_ring virtio_pci virtio_scsi virtio_net virtio_balloon" -f -v /boot/initramfs-4.1.12-112.16.4.el7uek.x86_64.img 4.1.12-112.16.4.el7uek.x86_64
dracut module 'busybox' will not be installed, because command 'busybox' could not be found!
dracut module 'dmsquash-live-ntfs' will not be installed, because command 'ntfs-3g' could not be found!
dracut module 'cifs' will not be installed, because command 'mount.cifs' could not be found!
dracut module 'busybox' will not be installed, because command 'busybox' could not be found!
dracut module 'dmsquash-live-ntfs' will not be installed, because command 'ntfs-3g' could not be found!
dracut module 'cifs' will not be installed, because command 'mount.cifs' could not be found!
*** Including module: bash ***
*** Including module: nss-softokn ***
*** Including module: i18n ***
*** Including module: network ***
*** Including module: ifcfg ***
*** Including module: drm ***
*** Including module: plymouth ***
*** Including module: kernel-modules ***
*** Including module: qemu ***
*** Including module: resume ***
*** Including module: rootfs-block ***
*** Including module: terminfo ***
*** Including module: udev-rules ***
Skipping udev rule: 40-redhat-cpu-hotplug.rules
Skipping udev rule: 91-permissions.rules
*** Including module: biosdevname ***
*** Including module: systemd ***
*** Including module: usrmount ***
*** Including module: base ***
*** Including module: fs-lib ***
*** Including module: shutdown ***
*** Including modules done ***
*** Installing kernel module dependencies and firmware ***
*** Installing kernel module dependencies and firmware done ***
*** Resolving executable dependencies ***
*** Resolving executable dependencies done***
*** Hardlinking files ***
*** Hardlinking files done ***
*** Stripping files ***
*** Stripping files done ***
*** Generating early-microcode cpio image contents ***
*** Constructing GenuineIntel.bin ****
*** Store current command line parameters ***
*** Creating image file ***
*** Creating microcode section ***
*** Created microcode section ***
*** Creating image file done ***
*** Creating initramfs image file '/boot/initramfs-4.1.12-112.16.4.el7uek.x86_64.img' done ***
[root@db12c 


Let's check if virtio modules are part of initrd:


[root@db12c ~]# lsinitrd | grep -i virtio
-rw-r--r--   1 root     root        29206 Mar 13  2018 usr/lib/modules/4.1.12-112.16.4.el7uek.x86_64/kernel/drivers/block/virtio_blk.ko
-rw-r--r--   1 root     root        59966 Mar 13  2018 usr/lib/modules/4.1.12-112.16.4.el7uek.x86_64/kernel/drivers/char/virtio_console.ko
-rw-r--r--   1 root     root        33342 Mar 13  2018 usr/lib/modules/4.1.12-112.16.4.el7uek.x86_64/kernel/drivers/scsi/virtio_scsi.ko
drwxr-xr-x   2 root     root            0 Oct  1  2018 usr/lib/modules/4.1.12-112.16.4.el7uek.x86_64/kernel/drivers/virtio
-rw-r--r--   1 root     root        22230 Mar 13  2018 usr/lib/modules/4.1.12-112.16.4.el7uek.x86_64/kernel/drivers/virtio/virtio.ko
-rw-r--r--   1 root     root        36398 Mar 13  2018 usr/lib/modules/4.1.12-112.16.4.el7uek.x86_64/kernel/drivers/virtio/virtio_pci.ko
-rw-r--r--   1 root     root        23582 Mar 13  2018 usr/lib/modules/4.1.12-112.16.4.el7uek.x86_64/kernel/drivers/virtio/virtio_ring.ko
[root@db12c ~]#

So now it's time to shutdown the VM and start the export:

[root@db12c ~]# shutdown now

Exporting the VM from Oracle VirtualBox:

Select the VM to be exported:


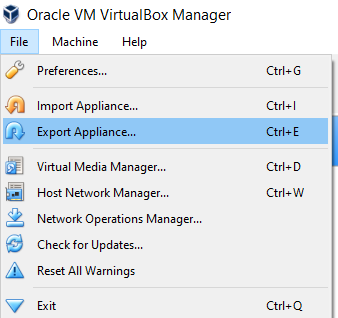
Click in "File" -> "Export Appliance"


Select the format "Oracle Public Cloud Format 1.0":


Click on the button "Export":


The VM will start to be exported:


Uploading the File that has the exported VM to Oracle OCI:


Follow the steps in the article How to create an Instance Custom Template in Oracle Cloud using VMware VMDK Files. If you want to upload the file with parallelism you can follow the steps in the article Using Multipart Upload with CLI to send a file to Oracle Object Storage


Creating the Instance from the Template:


Once we have the Template created, we will see a page similar to the following image,  then click in the button "Create Instance":


Specify the name of the new Instance and the Shape. In the "Image or operating system" select the template we just created in the previous step:


Specify the rest of the values, and then click in the button "Create":


The instance will start te get created:


Wait until the Instance is in status "RUNNING":


Testing the Connectivity:

The basic test is just a ping to the public IP:


Create a Console Connection following the steps in the article How to connect with VNC to Oracle OCI Instance


Using Multipart Upload with CLI to send a file to Oracle Object Storage

The Oracle Cloud Infrastructure Object Storage service supports multipart uploads for more efficient and resilient uploads, especially for large objects.

With multipart uploads, individual parts of an object can be uploaded in parallel to reduce the amount of time you spend uploading. 

Multipart uploads can accommodate objects that are too large for a single upload operation. Oracle recommends that you perform a multipart upload to upload objects larger than 100 MiB. The maximum size for an uploaded object is 10 TiB. Object parts must be no larger than 50 GiB. For large uploads performed through the API, you have the flexibility of pausing between the uploads of individual parts, and resuming the upload when your schedule and resources allow.


The first step is to Install and Configure OCI CLI, you can follow the articles:


Then Upload the File using the command "oci os object put", in this example I will upload the file "C:\Users\Deiby Gomez\Documents\OracleDB12102.tar.gz" with a size of 26G, I will create parts of 1G each and upload 4 parts in parallel:

PS C:\WINDOWS\system32> oci os object put --namespace-name idt6zjv16ewi -bn ImportedVMs --file 'C:\Users\Deiby Gomez\Doc
uments\OracleDB12102.tar.gz' --name OracleDB12102 --parallel-upload-count 4 --part-size 1024
Upload ID: b1e5a160-55e0-52e6-09be-4238ac10b9c4
Split file into 26 parts for upload.
Uploading object  [------------------------------------]    0%


You can monitoring the upload by using the command "oci os multipart list":


PS C:\WINDOWS\system32> oci os multipart list --namespace-name idt6zjv16ewi -bn ImportedVMs
{
  "data": [
    {
      "bucket": "ImportedVMs",
      "namespace": "idt6zjv16ewi",
      "object": "OracleDB12102",
      "time-created": "2020-04-23T00:39:42.230000+00:00",
      "upload-id": "b1e5a160-55e0-52e6-09be-4238ac10b9c4"
    }
  ]
}
PS C:\WINDOWS\system32>


The Upload will progress much faster:


PS C:\WINDOWS\system32> oci os object put --namespace-name idt6zjv16ewi -bn ImportedVMs --file 'C:\Users\Deiby Gomez\Doc
uments\OracleDB12102.tar.gz' --name OracleDB12102 --parallel-upload-count 4 --part-size 1024
Upload ID: b1e5a160-55e0-52e6-09be-4238ac10b9c4
Split file into 26 parts for upload.
Uploading object  [#####-------------------------------]   15%  0d 21:27:16


PS C:\WINDOWS\system32> oci os object put --namespace-name idt6zjv16ewi -bn ImportedVMs --file 'C:\Users\Deiby Gomez\Doc
uments\OracleDB12102.tar.gz' --name OracleDB12102 --parallel-upload-count 4 --part-size 1024
Upload ID: b1e5a160-55e0-52e6-09be-4238ac10b9c4
Split file into 26 parts for upload.
Uploading object  [####################################]  100%
{
  "etag": "c527ccff-7bcf-4e95-8ead-b1c723ea95a4",
  "last-modified": "Thu, 23 Apr 2020 12:49:06 GMT",
  "opc-multipart-md5": "DRPDP2U4AhcJIUG0f2W2uw==-26"
}
PS C:\WINDOWS\system32>


Once the File is uploaded, you can check its status:


You can check the file in the web:


miércoles, 22 de abril de 2020

How to Install Oracle Cloud Infrastructure CLI in Windows

In order to Install CLI, we will need three things:

  1. Tenancy's OCID
  2. User OCID
  3. RSA Key pair in PEM format


    Obtaining  Tenancy's OCID:

    In the main manu, Click on "Administration" -> "Tenancy Details":


    Copy the OCID of your Tenancy:


    Obtaining User OCID:

    In the main manu, Click on "Identity" -> "Users":


    Copy the User OCID:


    Obtaining RSA Key pair in PEM format


    You can create the public and private keys by your own, or you can create it automatically during the process of CLI installation and configuration. In this example, I will let the configuration to create them.


    Installing CLI in Windows:


    Open PowerShell as Administrator:


    Execute the following Lines:


    To configure the remote execution policy for PowerShell, run the following command.

    Set-ExecutionPolicy RemoteSigned

    To run the installer script, run the following command.

    powershell -NoProfile -ExecutionPolicy Bypass -Command "iex ((New-Object System.Net.WebClient).DownloadString('https://raw.githubusercontent.com/oracle/oci-cli/master/scripts/install/install.ps1'))"

    You will be asked for the values of some parameters, answer properly. An example of the output is the following:


    Python will start to be installed:


    Then CLI will be installed:


    In order to get all the environment with the CLI tool, re-open the Power Shell.

    Now it's time to configure CLI, here is where the public key and private key will be generated:

    Execute the command: 

    oci setup config

    You will have to provide the Tenancy OCID and User OCID, at the beginnnig of this article we got them:


    The public and private key will be generated:


    Now it's time to upload the Public Key and link it to our User in the Oracle Cloud web console:


    In the main manu, Click on "Identity" -> "Users":


    Click on the User and then click on the button "Add Public Key":


    Upload the Public Key we just created with the OCI configuration:


    Now, OCI CLI is ready to be used.

    Let's test it:

    Getting the Namespace with the command:

    oci os ns get


    Getting the Compartments with the command:

    oci iam compartment list


    Checking our Object Storage Bucket with the command:

    oci os bucket list --compartment-id ocid1.tenancy.oc1..*** --namespace-name idt6zjv16ewi


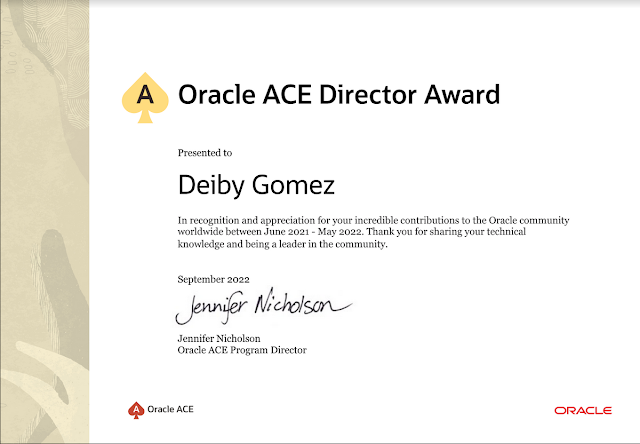
    Oracle ACE Director Award - Deiby Gómez

    Thanks #OracleACE Program for this awesome certificate recognizing the work I have done in the community for the last year. Looking forwa...